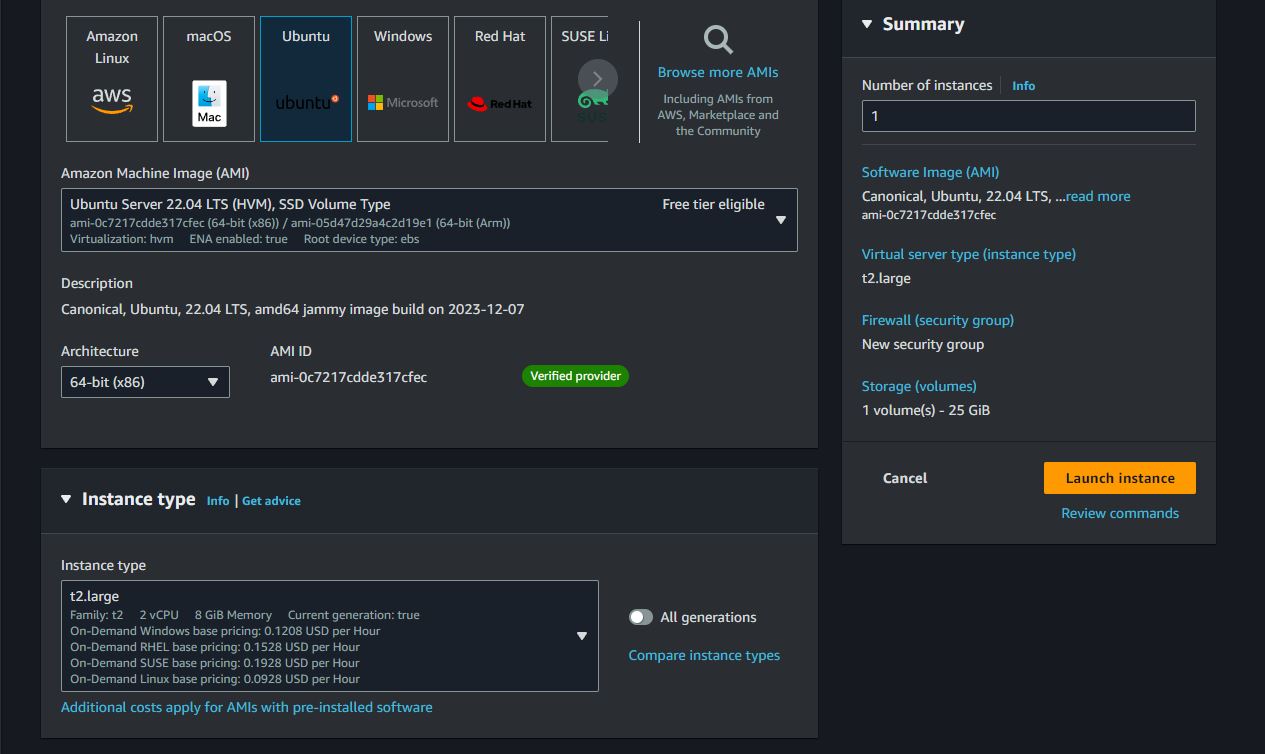
Log in to the AWS Management Console and navigate to the EC2 dashboard.
Click on the "Launch Instance" button and select an Ubuntu Server Amazon Machine Image (AMI).
Create new key pair for ssh login
Select t5.Large as the instance type with at least 25GiB of gp2 EBS.
For cost saving select spot instance pricing (if desired).
Configure a security group to allow inbound traffic on port 22 for SSH, port 8081 for Netflix, port 9000 for SonarQube,
and port 8080 for Jenkins.
Step 2: Connecting to the EC2 Instance
Once the instance is running, connect to it using SSH. You can use a tool like PuTTY (for Windows) or the terminal (for macOS/Linux) to establish a secure connection.
Step 3: Clone Repository
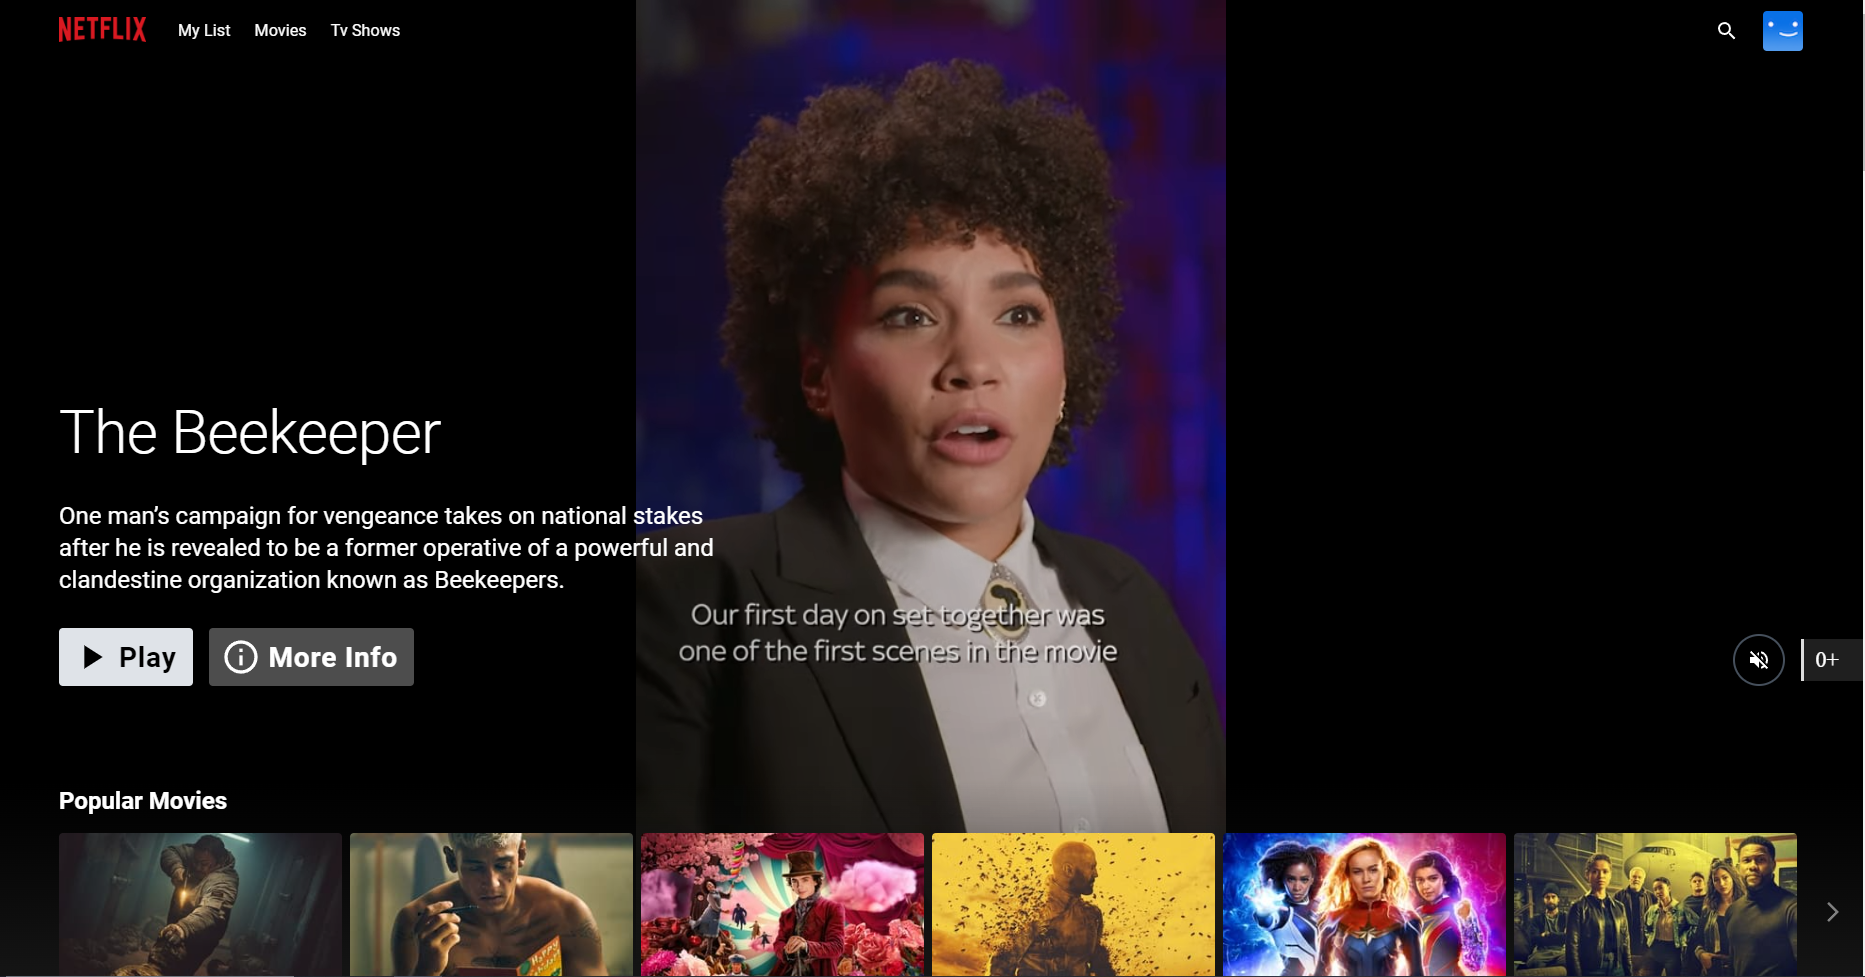
The Github repo I used for this project was provided by "N4si" on Github "https://github.com/N4si/DevSecOps-Project"
while connected via SSH run "git clone https://github.com/N4si/DevSecOps-Project.git"
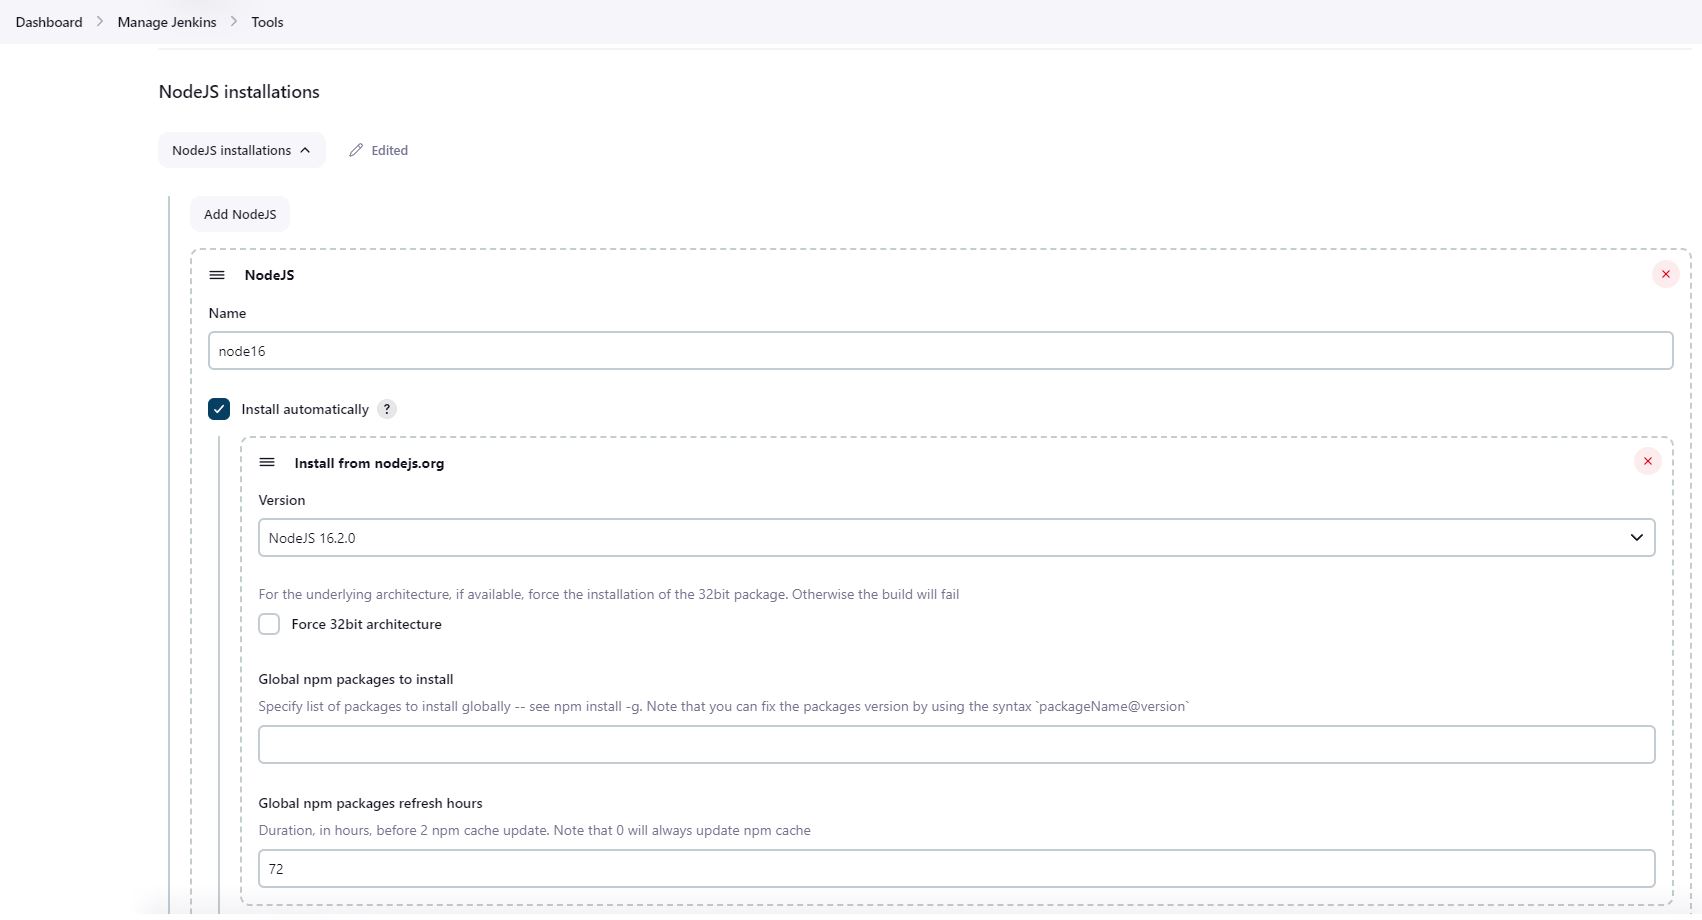
Step 4: Configure Docker
Run the following commands in SSH terminal to update Ubuntu, install, and configure Docker
sudo apt-get update
sudo apt-get install docker.io -y
sudo usermod -aG docker $USER # Replace with your system's username, e.g., 'ubuntu'
newgrp docker
sudo chmod 777 /var/run/docker.sock
Step 5: TMDB API Key
Go to https://www.themoviedb.org and create an account
navigate to https://www.themoviedb.org/settings/api
Follow the Create App prompt
Once app is created, under the "Settings" menu on the left select "API"
Take note of the API Key listed
Step 6: Build Docker Image
Run the following commands in SSH terminal to build Docker image using TMDB API Key argument
Log in to the AWS Management Console and navigate to the EC2 dashboard.
Click on the "Launch Instance" button and select an Ubuntu Server Amazon Machine Image (AMI).
For best practices, launch this instance in a different subnet from your app development server
Select t2.Medium as the instance type with at least 25GiB of gp2 EBS.
For cost saving select spot instance pricing (if desired).
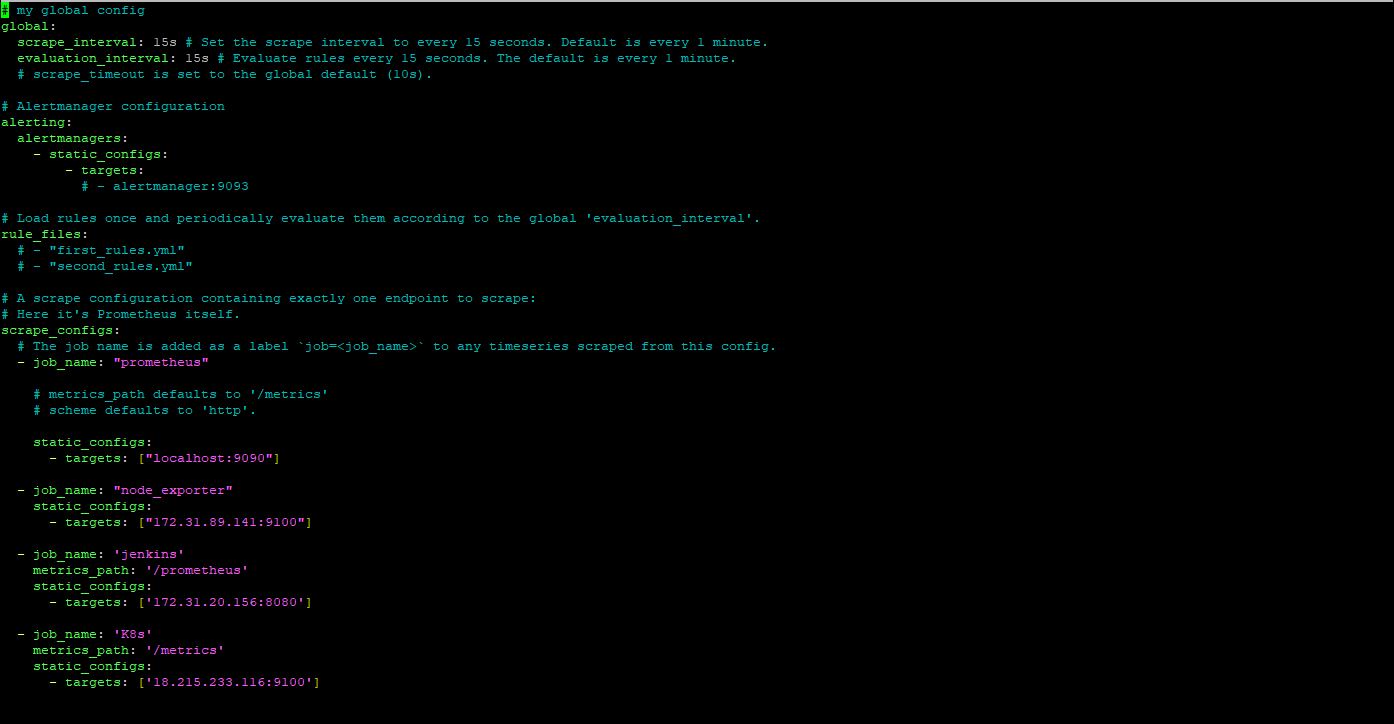
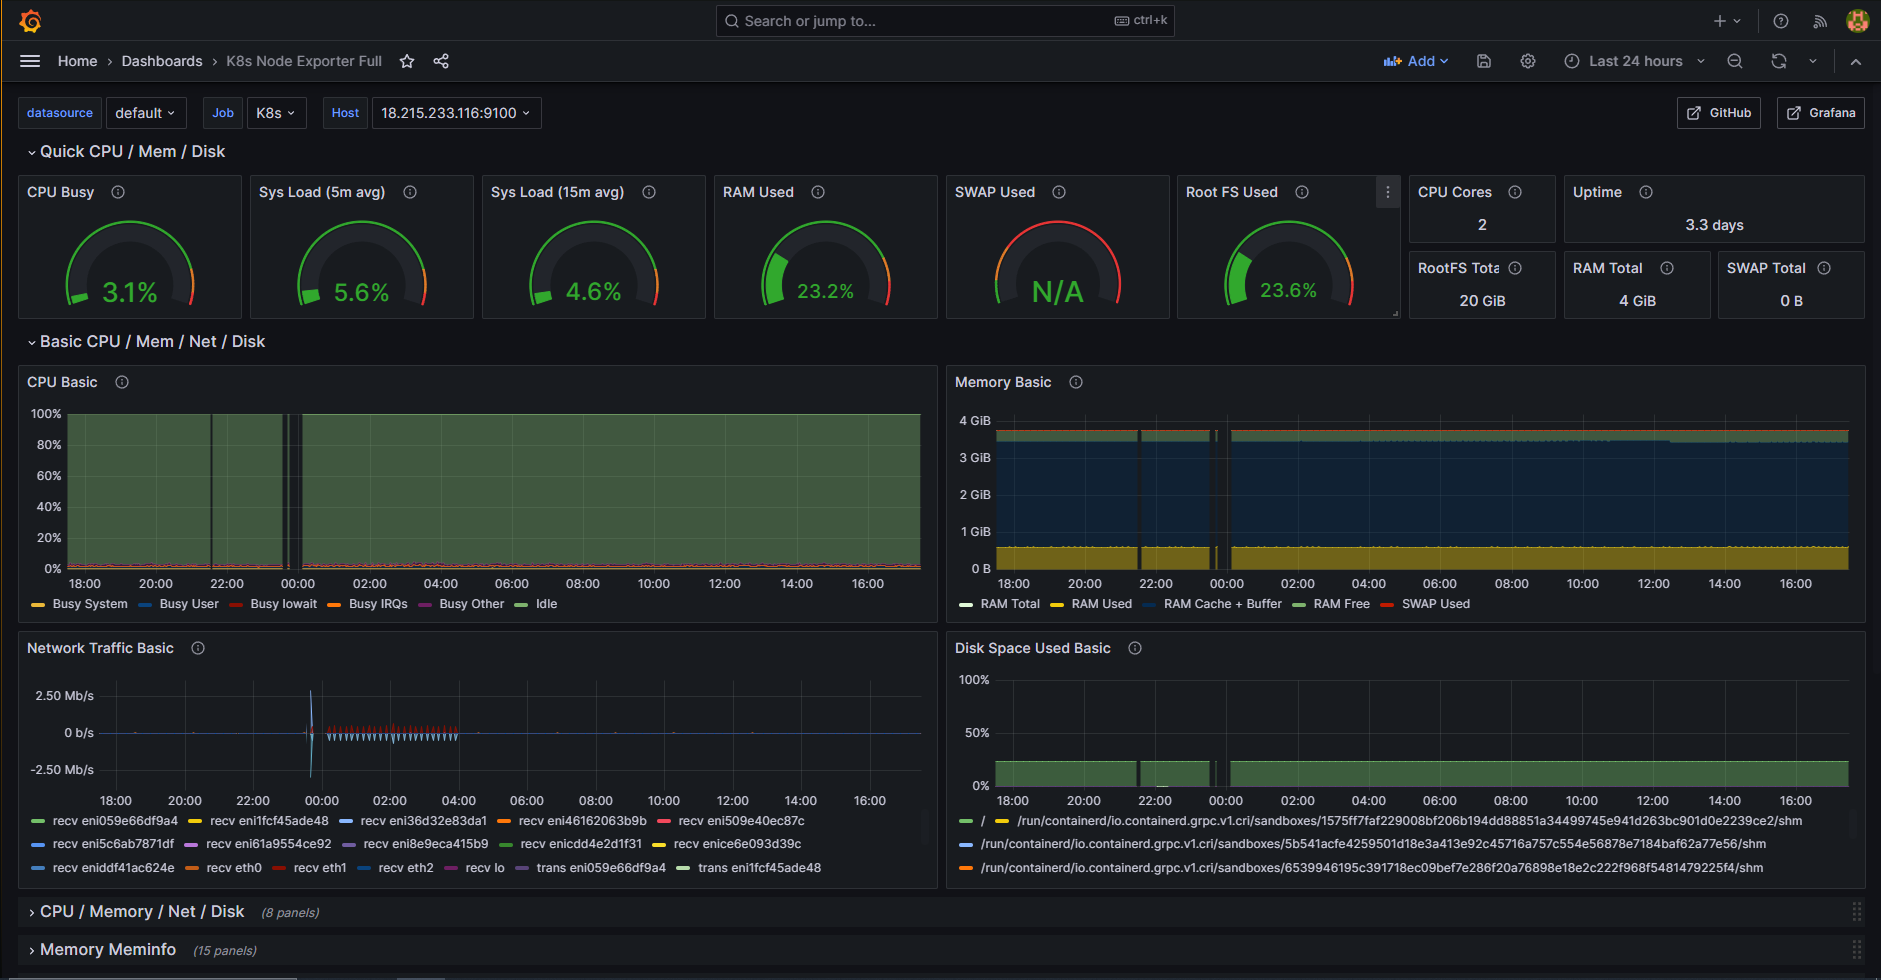
Configure a new security group to allow inbound traffic on port 22 for SSH, port 9090 for Prometheus, port 9100
for Node Exporter, and port 3000 for Grafana.
Step 13: Connecting to the EC2 Instance
Once the instance is running, connect to it using SSH. You can use a tool like PuTTY (for Windows) or the terminal (for macOS/Linux) to establish a secure connection.
echo "deb https://packages.grafana.com/oss/deb stable main" | sudo tee -a /etc/apt/sources.list.d/grafana.list
sudo apt-get update
sudo apt-get -y install grafana
sudo systemctl enable grafana-server
sudo systemctl start grafana-server
sudo systemctl status grafana-server # Confirm Grafana status
Access Grafana via your publicIP:3000
When you log in for the first time, Grafana will prompt you to change the default password for security reasons. Follow the prompts to set a new password.
Click on the gear icon (⚙) in the left sidebar to open the "Configuration" menu.
Select Data Sources > Add Data Source > Prometheus
Add http://localhost:9090 to the HTTP input and click Save & Test
Import a pre-configured dashboard by clicking the "+" (plus) icon in the left sidebar to open the "Create" menu.
Goto Dashboard > Import > (enter dashboard code from https://grafana.com/grafana/dashboards/)
Select Prometheus as data source then click import
You should now have a pre-configured dashboard available
Once this is complete navigate back to Jenkins in your browser and install the Prometheus plugin
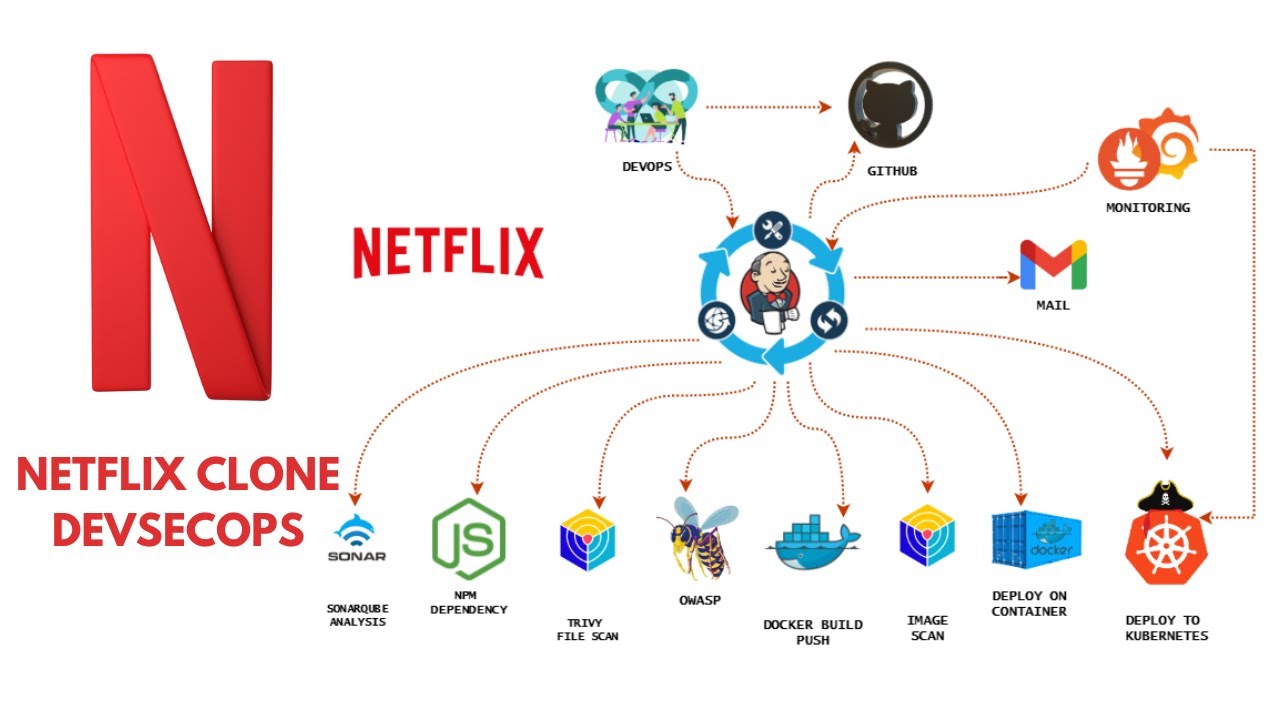
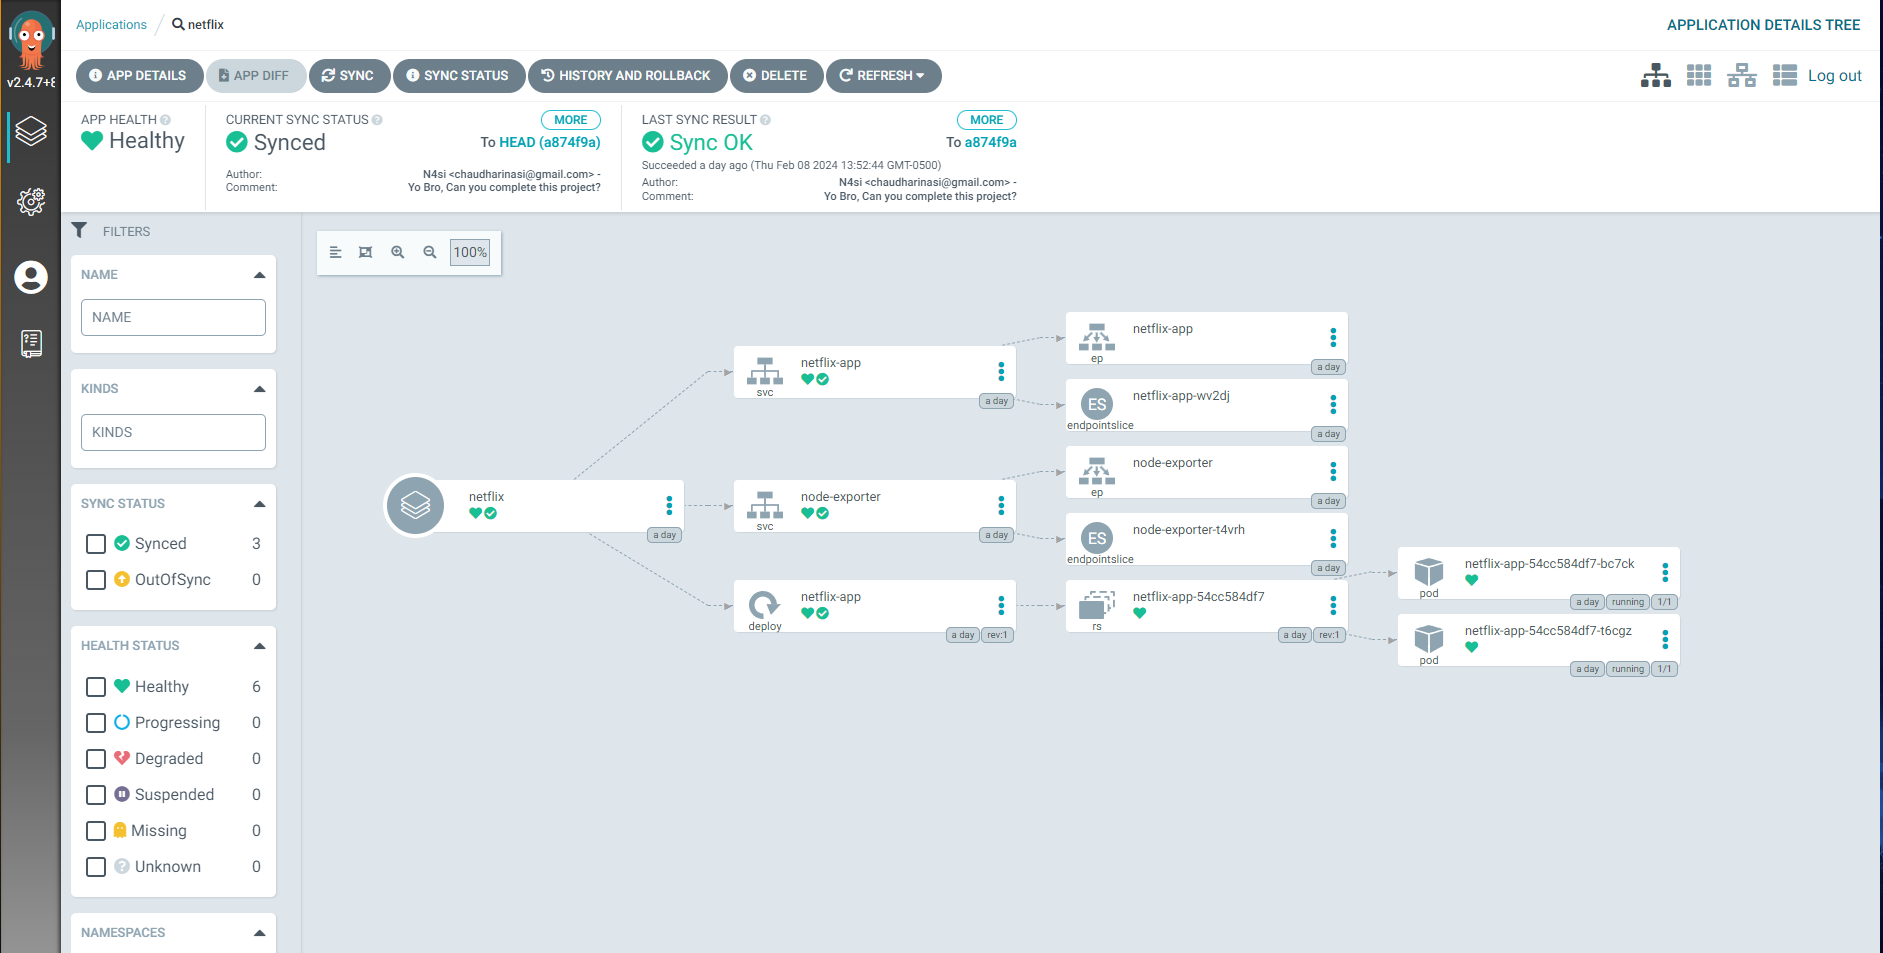
Container Orchestration
Amazon Web Services Elastic Kubernetes Service (EKS)
Ubuntu OS /t3.Medium 25GiB gp2 EBS
EKS Instance Node Group
Step 17: Create Kubernetes Cluster
In AWS navigate to EKS dashboard and select Add Cluster
Create an IAM Role with the 'AmazonEKSClusterPolicy' attached
You may need to remove us-east-1a subnet to deploy cluster (this sn seems to be full frequently)
Configure a security group to open port 3000 for Grafana, 9100 for Node Exporter, and 30007 for ELB
Use default add-ons
Once created, navigate to your EKS cluster, then to the Compute tab
Click Add Node Group and name it 'nodes'
Create an IAM role with the following policies attached: